


Have you ever looked at a photo and thought, “Wow, the light is just magical!” Chances are, that photo was taken using natural light. There’s something about the sun’s rays that can make even the most ordinary subject look extraordinary. And the best part? You don’t need fancy equipment to harness its power. This step-by-step guide will equip you with the knowledge to shoot in natural light like a pro, even if you’re just starting out.
Understanding the Power of Natural Light
Before we dive into the how-to, let’s take a moment to appreciate why natural light is such a game-changer in photography. Unlike artificial light, which can sometimes feel harsh and unnatural, natural light is dynamic and flattering. It can be soft and diffused on a cloudy day, creating a dreamy look, or bright and directional during the golden hour, casting long shadows and adding drama.
Essential Tools for Shooting in Natural Light
You don’t need a truckload of gear, but a few key items can enhance your natural light photography:
- Camera: A DSLR or mirrorless camera gives you greater control over your settings, but even a smartphone can capture beautiful natural light photos.
- Lens: A versatile lens like a 35mm or 50mm is a great all-rounder for different types of shots.
- Reflector: A reflector helps bounce light back onto your subject, reducing shadows and creating even illumination.
- Diffusion panel: On bright sunny days, a diffusion panel softens the light and prevents harsh shadows.
Step 1: Choose the Right Time of Day
The time of day significantly impacts the quality of natural light. Here’s a quick breakdown:
- Golden Hour (Shortly after sunrise and before sunset): Known for its warm, golden light and soft shadows, it’s considered the most magical time for photography.
- Blue Hour (Before sunrise and after sunset): As the name suggests, this time offers a cool, blue hue, perfect for moody and atmospheric shots.
- Midday (Around noon): The harshest light of the day, with strong shadows. While challenging, you can still achieve great results with the right techniques.
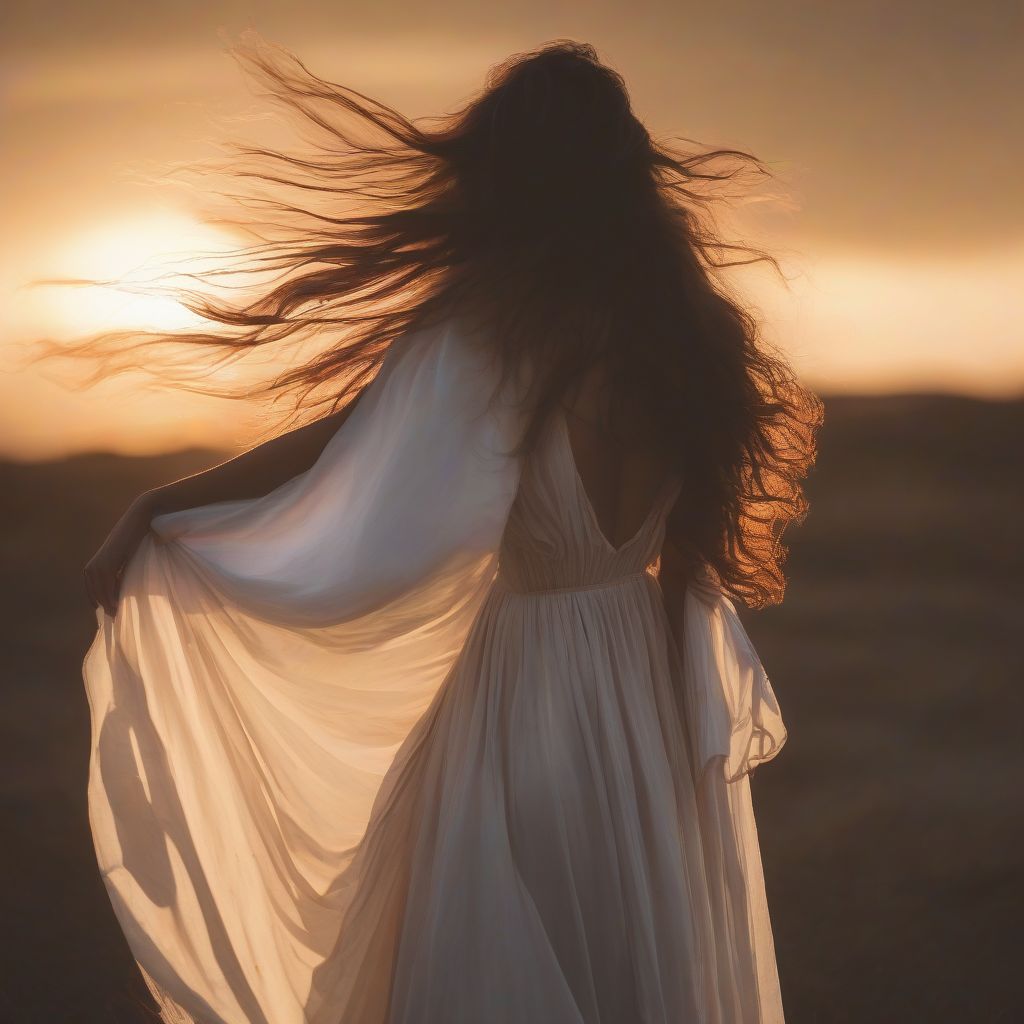
Step 2: Master the Art of Backlighting
Backlighting simply means positioning your light source (in this case, the sun) behind your subject. It’s a fantastic way to create a soft, ethereal glow and separate your subject from the background.
Tips for Backlighting:
- Use spot metering to expose for your subject.
- Consider using a reflector to bounce light back onto your subject’s face.
- Experiment with different angles to find the most flattering light.
 Backlighting Portrait Photography
Step 3: Embrace Diffused Light
Cloudy or overcast days provide naturally diffused light, which is incredibly flattering for portraits and detail shots. The clouds act like a giant softbox, softening the light and minimizing harsh shadows.
Tips for Shooting in Diffused Light:
- Increase your ISO if needed to maintain a fast shutter speed.
- Use a slightly warmer white balance to compensate for the cooler tones of overcast light.
- Look for pockets of interesting light, such as light reflecting off a white wall.
Step 4: Work with Window Light
Don’t underestimate the power of a simple window! Window light can be incredibly versatile, depending on the time of day and the direction the window faces.
Tips for Using Window Light:
- North-facing windows provide soft, diffused light throughout the day.
- South-facing windows offer stronger, more directional light.
- Experiment with placing your subject at different distances from the window to control the intensity of the light.
 Window Light Food Photography
Step 5: Master White Balance
White balance ensures that the colors in your photos are accurate. Different lighting conditions have different color temperatures, and adjusting your white balance compensates for this.
Tips for White Balance:
- Use Auto White Balance (AWB) for most situations.
- For greater accuracy, use your camera’s preset white balance modes (Daylight, Cloudy, Shade, etc.).
- Shoot in RAW format to fine-tune white balance in post-processing.
Conclusion
Shooting in natural light is a rewarding experience that allows you to capture stunning images filled with life and beauty. By understanding the nuances of light, mastering basic techniques, and experimenting with different approaches, you’ll be well on your way to creating captivating photographs that truly shine. Remember, the best camera is the one you have with you, and with the power of natural light at your fingertips, you can capture extraordinary moments wherever you go.
Now it’s your turn! What are your favorite tips for shooting in natural light? Share your thoughts and photos in the comments below.